HackTheBox - Analyzing Windows Event Logs En Masse

The Get-WinEvent cmdlet is an essential PowerShell tool for querying Windows Event Logs at scale. It will make your job much easier by letting you search through all kinds of logs, from the familiar System and Application logs to the more advanced ones created by Windows Event Log services and Event Tracing for Windows (ETW).
The purpose of this write-up is to walk you through the answer to the following challenge question. Without further ado, let’s dive in! 🔍.
Utilize the Get-WinEvent cmdlet to traverse all event logs located within the C:\Tools\chainsaw\EVTX-ATTACK-SAMPLES\Lateral Movement directory and determine when the \\*\PRINT share was added. Enter the time of the identified event in the format HH:MM:SS as your answer
In order to answer this question, the first thing you need to understand is: what does \\*\PRINT actually mean anyway?.
The string \\*\PRINT is a UNC (Universal Naming Convention) path pattern that Windows uses when dealing with network resources. Here is what each part actually means:
\\: This is the beginning of the UNC path.*: This is a wildcard that says “Match any server name”.\PRINT: It’s the shared resource namedPRINT.
In simple terms, \\*\PRINT basically represents any network path that points to a shared resource called PRINT on any host.
Here are some common examples of UNC paths:
\\Server01\SharedDocs\\Fileserver\Marketing\Reports\\192.168.1.10\Public\\*\\PRINT\\Laptop01\C$\Users\Javier\Documents
Now that you know what \\*\PRINT means, your task is to search across multiple .evtx in the C:\Tools\chainsaw\EVTX-ATTACK-SAMPLES\Lateral Movement directory for entries containing the string \\*\PRINT:
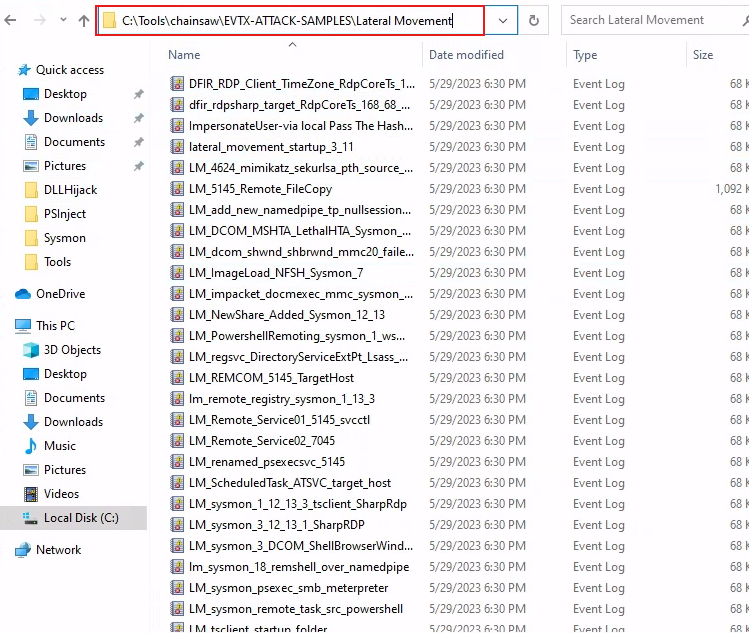
Sure, you could go through each file one by one, but that would tedious and time-consuming. Luckily, you’re who knows how to automate things, so you come up with a solution that involves the use of the Get-WinEvent cmdlet:
1
2
3
4
5
6
7
8
9
10
11
12
13
14
15
16
17
18
19
20
# List all the files in the provided folder.
Get-ChildItem -Path "C:\Tools\chainsaw\EVTX-ATTACK-SAMPLES\Lateral Movement" |
# Loop over each file so you can perform actions on each .evtx file.
ForEach-Object {
    try {
	    # Read the current .evtx file. If there's an error while reading, stop
	    # and jump to the catch block.
        Get-WinEvent -Path $_.FullName -ErrorAction Stop |
        # This is the actual fitler. Get entries where the Message field contains
        # the string \\*\PRINT
        Where-Object { $_.Message -like "*\\*\PRINT*" } |
        # Select and rename properties to make the output clear.
        Select-Object @{Name='EvtxFile';Expression={$_.LogName}},
                      @{Name='FilePath';Expression={$_.ProviderName}},
                      Id, TimeCreated, Message
    } catch {
	    # If an error ocurrs, don't break, print a warning instead.
        Write-Warning "I could not read $($_.FullName): $_"
    }
}
Essentially, this script loops through all .evtx files in the provided folder and searches in each file for events containing the string \\*\PRINT. The output is formatted as a clean table with relevant details like log name, provider, ID, time, and message.
When you run it, you get the following info:
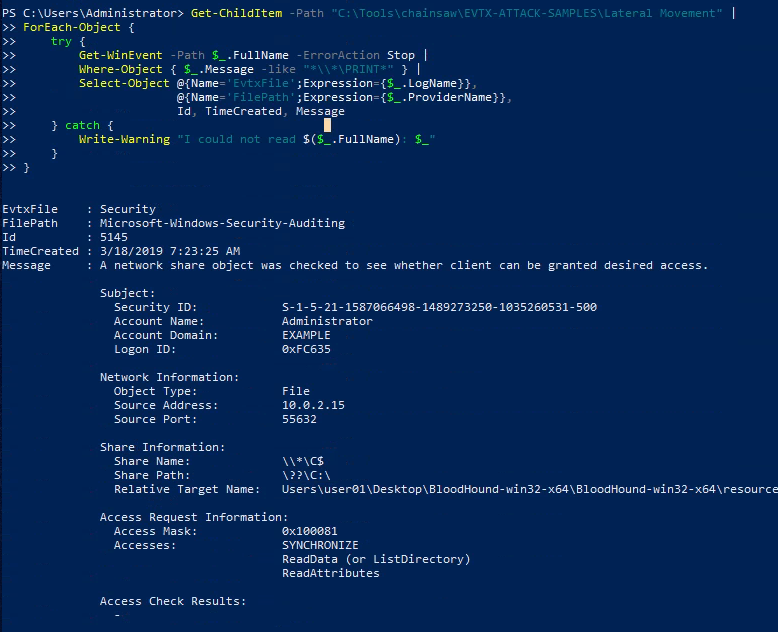
However, scroll down and pay attention to the last entry:
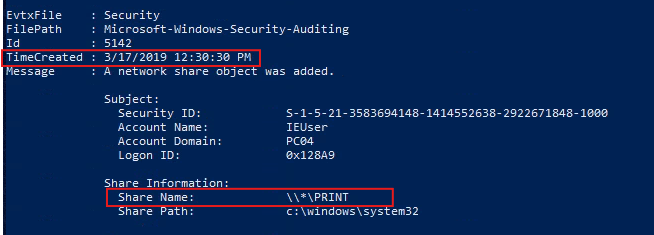
There you have you answer: 12:30:30
That’s it! Now you know how to analyze Windows Event Logs en masse using PowerShell. Keep experimenting, and happy hunting! 🕵️♂️