Understanding Delta Time in Wireshark

In network analysis, delta time is simply the difference in time between packets, that is, the time that passes between one packet and the one just before it. Delta time can help you analyze delays, latency, response times, and performance issues.
Let me show you what I’m talking about. Take a look at the next table:
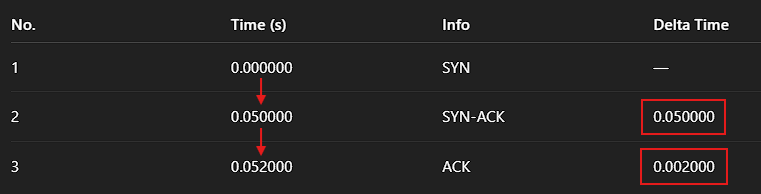
- Packet 1: A
SYNpacket dispatched by the client to start the connection. - Packet 2: A
SYN-ACKpacket received from the server in response. - Packet 3: A
ACKpacket sent by the client to complete the handshake.
Here, the delta time for Packet 2 is 0.050000s (0.050000 - 0.000000), meaning the server responded to the client’s SYN in 50ms. The delta time for Packet 3 is 0.002000s (0.052000 - 0.050000), the client took 2ms to reply with the final ACK. As you can see, there’s no delta time for Packet 1 because there’s no packet before it. Easy peasy, right?.
In Wireshark, you can view a packet’s delta time in the Frame layer of the encapsulation:
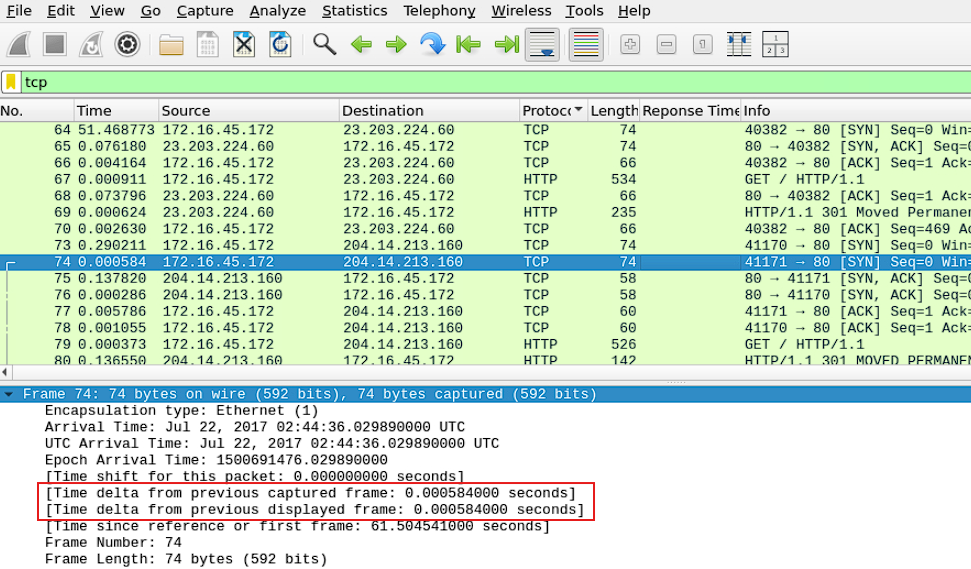
But why are there two types of delta time?. The reason Wireshark shows two types of delta time is because each serves a different purpose depending on what packets you’re looking at and whether or not you’re using a display filter that is affecting the view. To understand this difference, pay close attention to this simplified packet capture:
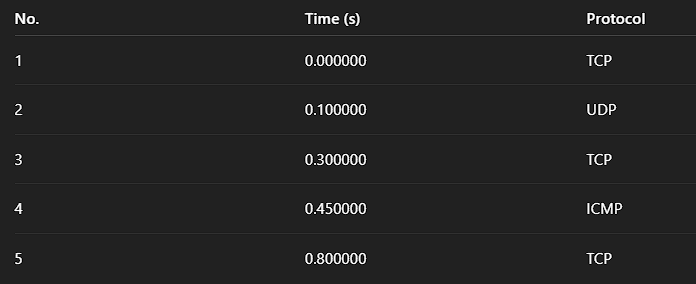
Here, you have different types of packets arriving at different times. Keep in mind no filter has been applied yet. So let’s explain.
Time Delta from Previous Captured Frame
It’s the time difference between the current packet and the one that was captured just before it, regardless of any display filter applied. This is the default meaning of delta time.
Going back to the packet capture above, you decide to apply a tcp display filter:
1
tcp
This will change the view in your Wireshark’s packet list pane to show only TCP packets:
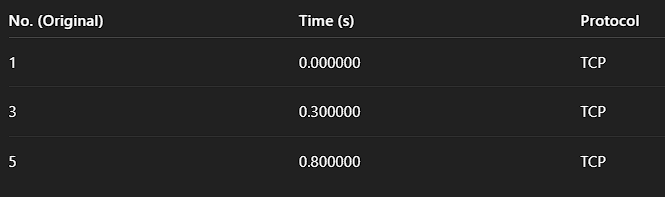
Only packets 1, 3, and 5 are displayed. In this case, delta time calculation is carried out between each current packet and the captured one before it, even if that preceding packet isn’t of the same type or is hidden because of a filter. This is what I mean:
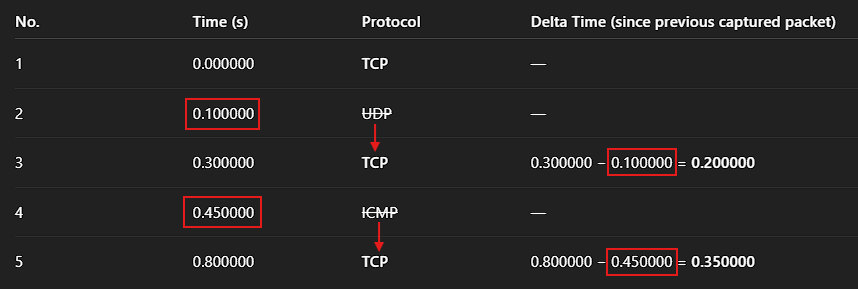
Notice that UDP and ICMP packets are included in the timing calculations.
With this information in mind, you can actually change the time display format of the Time column in the Wireshark’s Packet List pane to show the time difference between a packet and the one captured just before it. My recommendation as a best practice is to add a new column specifically for this delta time value, this way you preserve the original timestamp.
To do this, simply, right-click any column header in your Packet list pane, select Column Preferences:
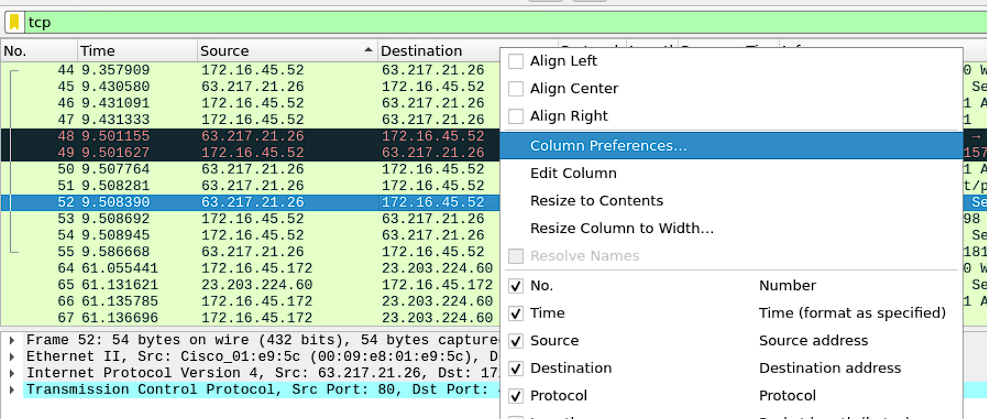
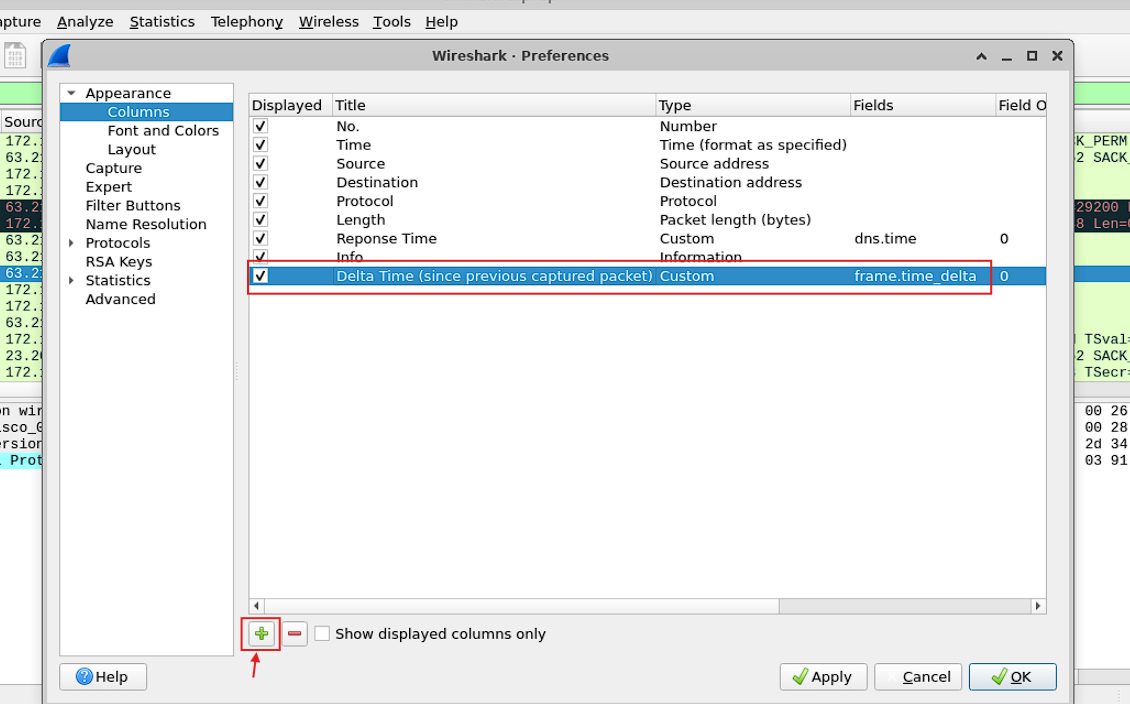
Click + to add a new column. Give the title you want, set Type to Custom, and in the Fields column enter the value frame.time_delta
Now, you´re seeing the delta time from previous captured frame as a visible column:
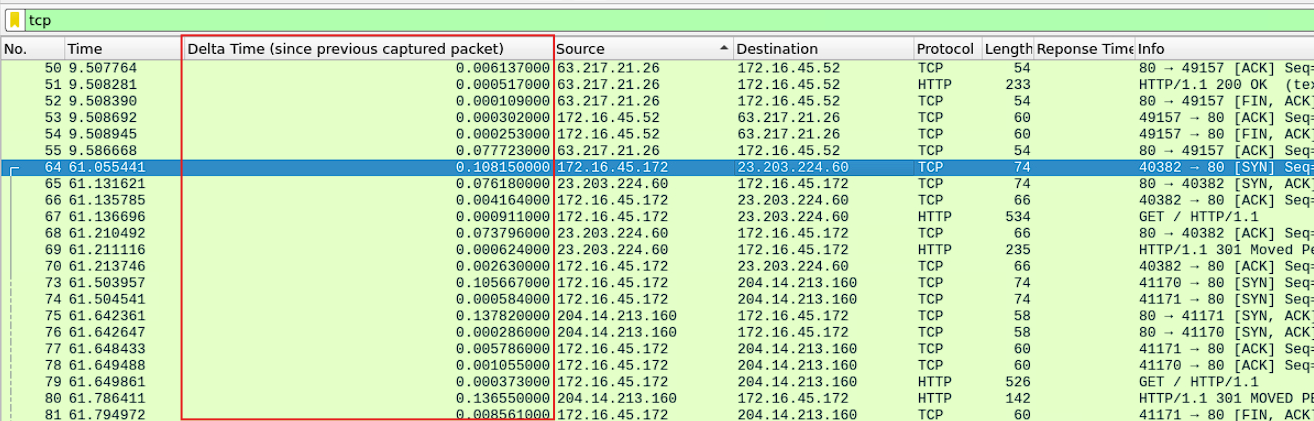
Time Delta from Previous Displayed Frame
It’s the time difference between the current packet and the one that is displayed just before it. This typically occurs after applying a display filter.
Let’s say that you apply the same tcp display filter as before to your simplified packet capture:
1
tcp
You obtain the same TCP packets:
Only packets 1, 3, and 5 are displayed. This time, however, the delta time is calculated between each current packet and the visible one before it, ignoring any hidden packet. This is what I mean:
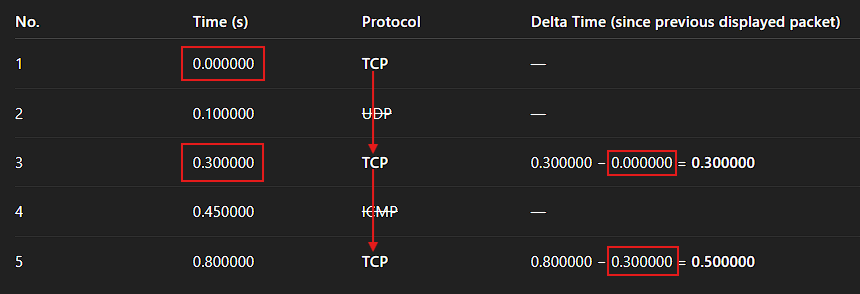
As you can see, this time UDP and ICMP packets are excluded in the timing calculations. Since they’re hidden by the display filter, they aren’t considered when calculating time differences. This can be really useful when you want to focus on just a specific part of the traffic.
With this in mind, you can add a new column specifically for this delta time value just like you did before, but this time instead of setting the Fields value to frame.time_delta, use frame.time_delta_displayed instead:
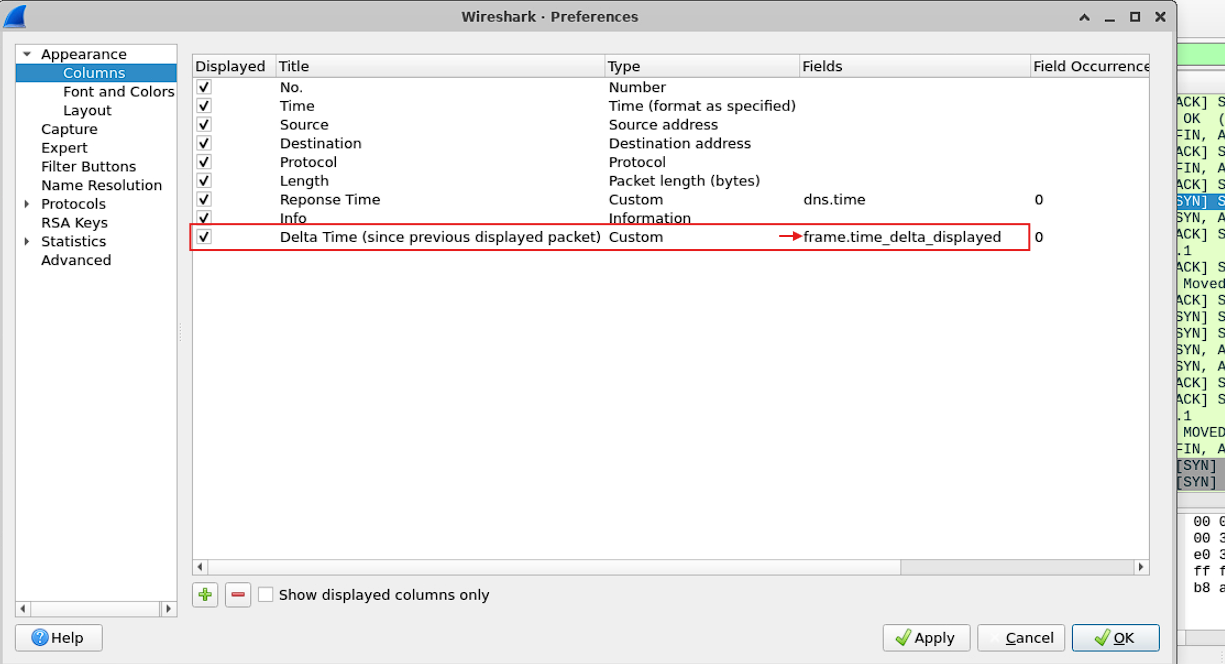
Now, you see the delta time from previous displayed frame as a visible column:
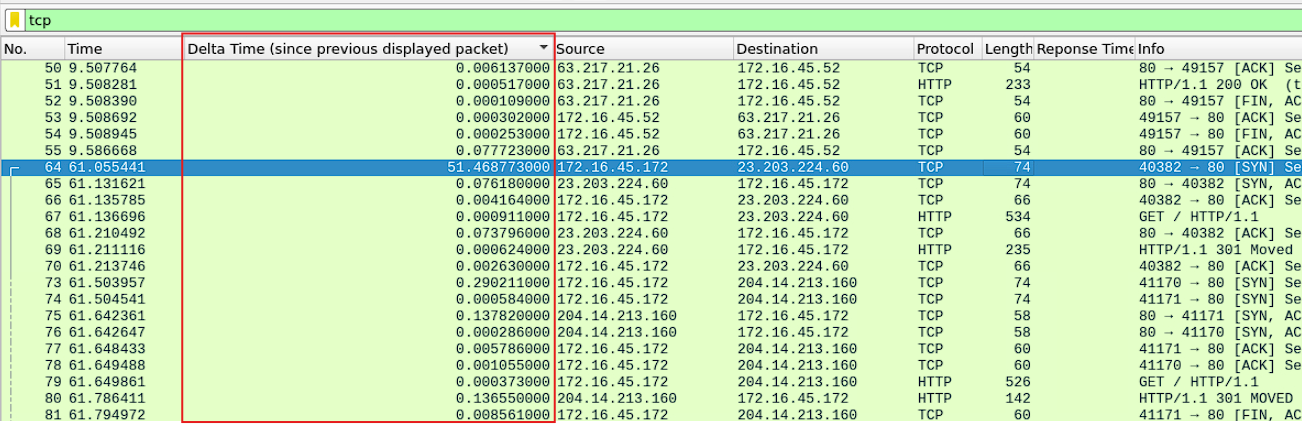
Now that you understand what delta time is all about, let me introduce you to another useful timing metric. While it’s not a delta time per se, you can find it useful when analyzing the timeline of a full conversation between two devices, and that’s the Time since first frame in this TCP stream.
Time Since First Frame in this TCP Stream
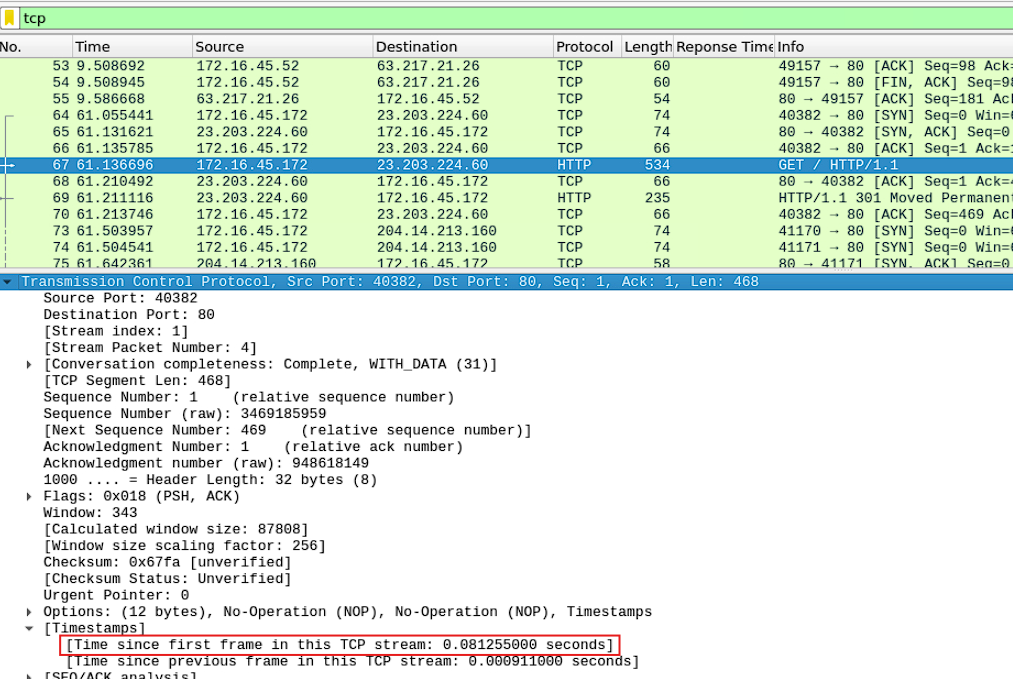
It’s the time difference between the current packet and the first packet of a specific TCP stream. You can see this metric in the TCP layer of the encapsulation:
But, what exactly is a TCP stream?.
A TCP stream is simply a conversation between two endpoints (hosts, servers, VMs, Cloud services, etc.) over a single TCP connection. Think of a TCP connection as a complete phone call:
- The “hello” is the TCP handshake (
SYN,SYN-ACK,ACK). - Everything said during the call is the data exchange (HTTP requests/responses, file transfers, etc.).
- The “goodbye” is the TCP connection termination (
FIN,FIN-ACK).
Since it’s perfectly normal for multiple TCP streams/connections to occur at the same time, Wireshark assigns each one a unique identifier called stream index, like Stream index: 0, Stream index: 1, etc.:
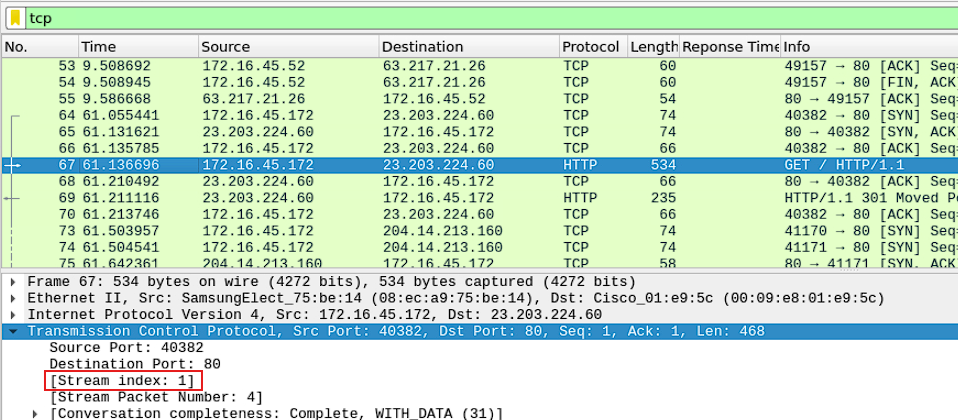
That unique identifier will help you isolate all the packets that belong to a specific TCP conversation, this way you can focus on just one stream at the time.
Now that you know what a TCP stream is, let’s isolate the whole conversation that the selected packet is part of. Just right-click on the packet you’re interested in and choose Follow → TCP Stream.
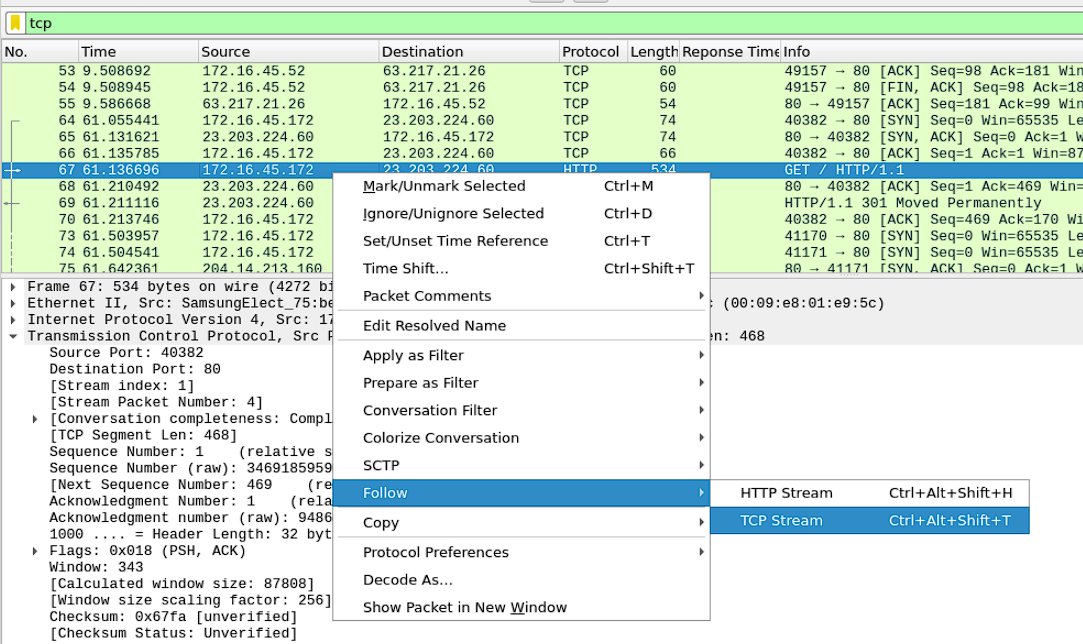
You’re now looking at the entire “phone call” that this packet is part of. So, when someone refers to the first packet of a specific TCP stream, they mean this one right here:
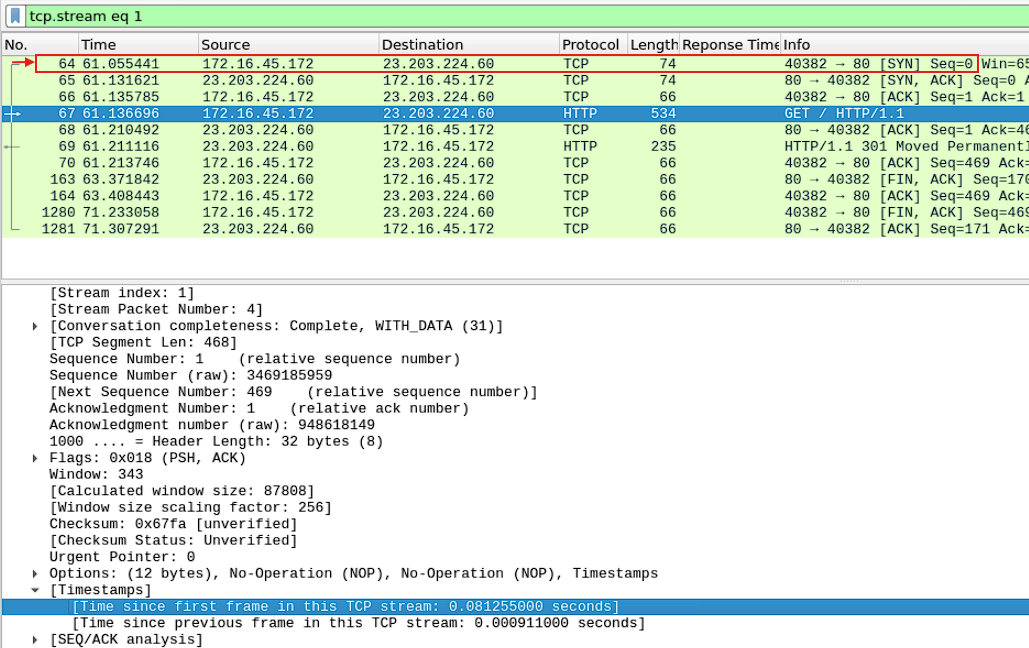
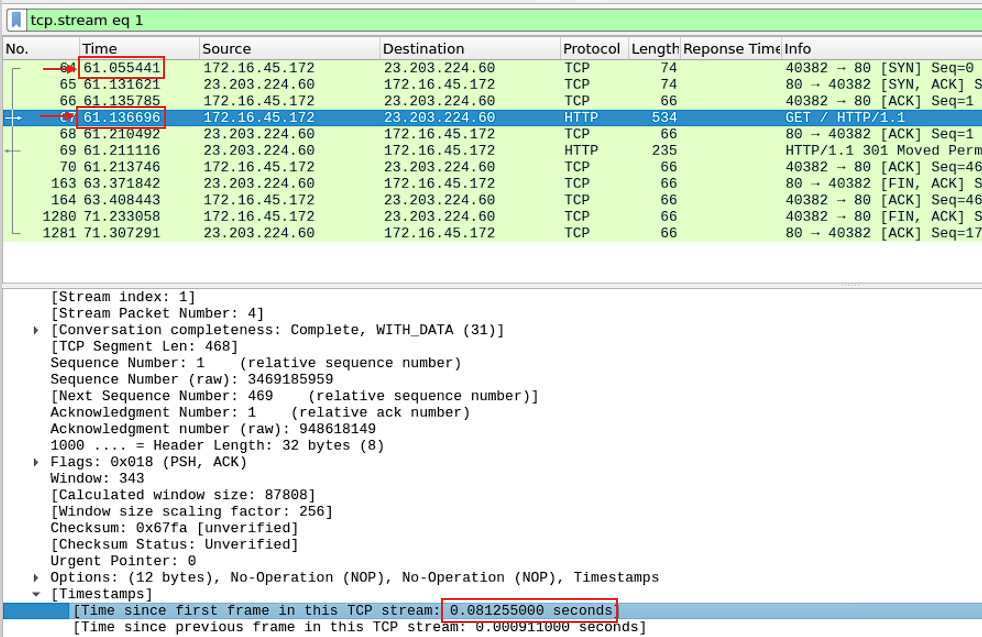
Typically, a TCP stream/connection begins with a SYN packet, this is the initial “hello” that kicks off the conversation. If you calculate the time difference between the selected packet and the first packet of this conversation, you’ll get how much time has passed since the TCP stream began:
1
61.136696 - 61.055441 = 0.081255
There is where your magic number comes from:
However, doing all this calculation manually can be tedious and time-consuming. There has to be an easier way, and actually there is!. Just right-click on the first packet and select Set/Unset Time Reference.
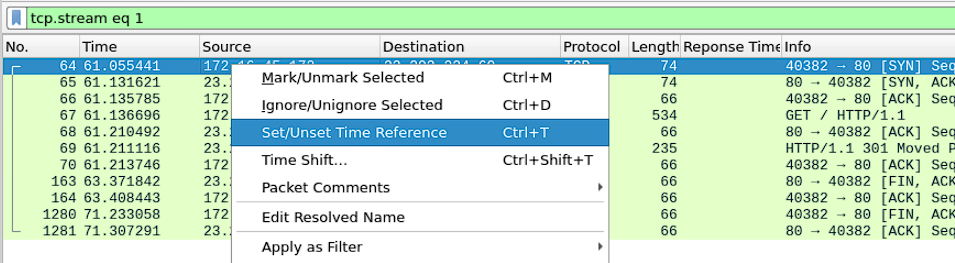
Now, all packets in the conversation are displayed with timestamps relative to the first one:
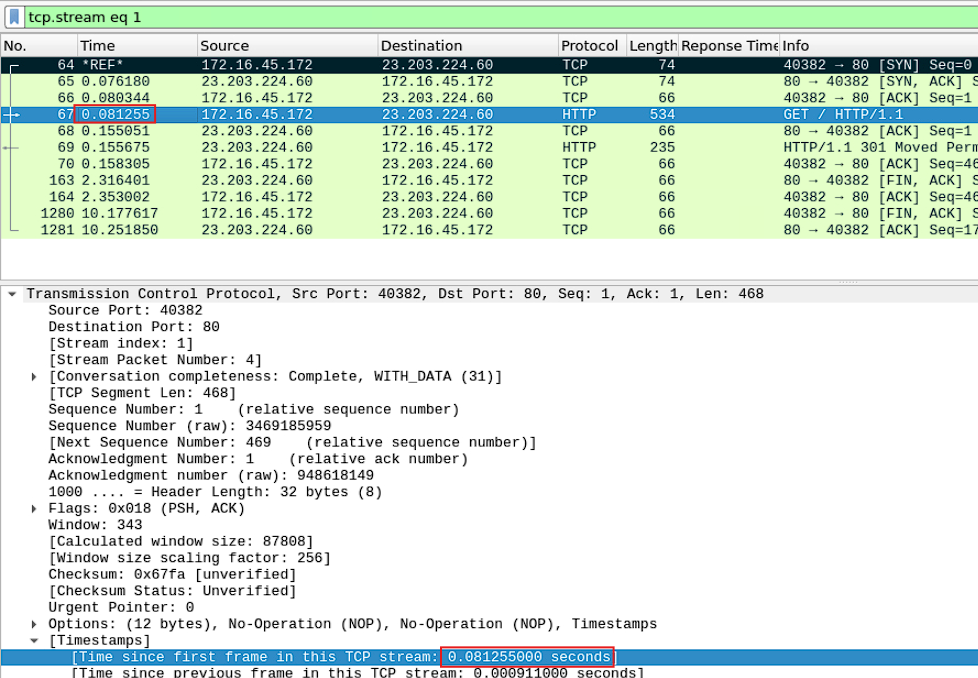
This feature is really useful when you want to measure how long it takes for something to happen after that point.
Bonus
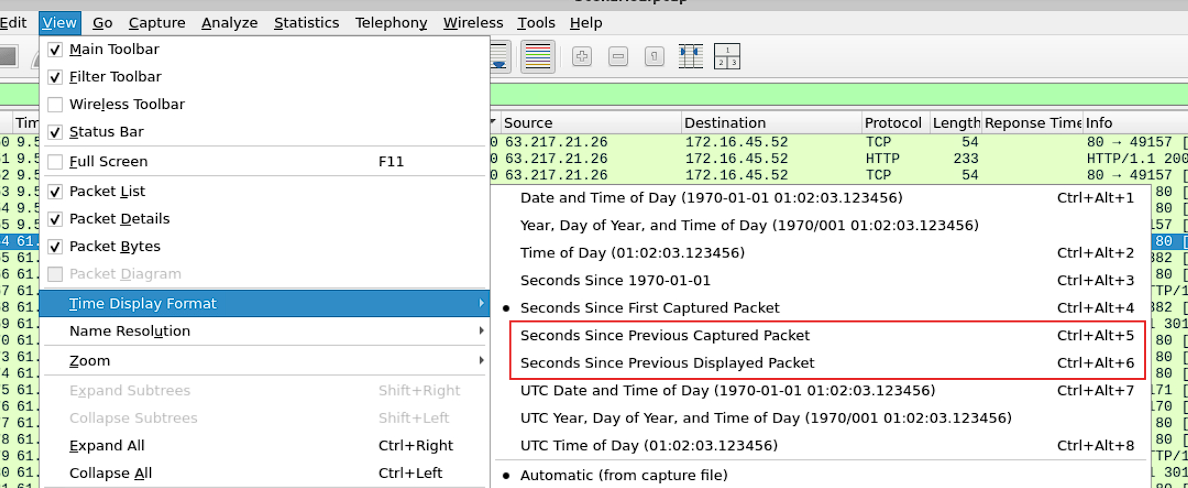
For those wondering how to change the Time column to directly show the delta time, whether from the previous captured frame or the previous displayed frame, here’s how you can do it.
Simply go to View → Time Display Format and you’ll see these two options, choose the one that best fits your needs.
And that’s it! I hope you’ve found this helpful, see you next time!